Add from Citavi
Add from Citavi option allows you to include references and related source files from Citavi to NVivo.
NOTE You can only share cloud projects from Citavi Web or Citavi Desktop.
Prerequisites
-
You must have internet connection to successfully export data from Citavi and import into NVivo.
-
Ensure you use the same email in your Citavi account as in your NVivo account.
-
You need to have a valid Citavi license to share the data from Citavi.
-
You need a valid NVivo license or at least a trial license for importing.
-
You need to have macOS 10.14 or above to use the Add from Citavi feature.
The following Mac devices can upgrade to 10.14 Mojave, but anything lower cannot upgrade.-
MacBook (Early 2015 or newer)
-
MacBook Air (Mid 2012 or newer)
-
MacBook Pro (Mid 2012 or newer)
-
Mac mini (Late 2012 or newer)
-
iMac (Late 2012 or newer)
-
iMac Pro (2017)
-
Mac Pro (Late 2013; Mid 2010 and Mid 2012 models
For more information, see Apple requirements ( macOS Mojave - Technical Specifications)
-
Steps to import from Citavi
Follow the below steps to import from Citavi:
NOTE Before you begin, ensure you use the same email in your Citavi account as in your NVivo account.
-
In Citavi, open the Citavi project that you want to import.
-
Click Share with NVivo.
-
In Citavi Web: Once the share is successful, notification is displayed on the top right and a green tick is displayed in the toolbar.
-
In Citavi Desktop: The project sharing status notification is displayed at the bottom right.
-
-
In NVivo, launch the project to which you want to import the Citavi data.
-
Select Import -> Add from Citavi.
Add from Citavi wizard is displayed.
NOTE Clicking on Add from Citavi on the macOS under 10.14, the following dialog will be displayed.
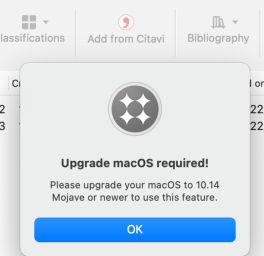 The following Mac devices can upgrade to 10.14 Mojave, but anything lower cannot upgrade.
MacBook (Early 2015 or newer)
MacBook Air (Mid 2012 or newer)
MacBook Pro (Mid 2012 or newer)
Mac mini (Late 2012 or newer)
iMac (Late 2012 or newer)
iMac Pro (2017)
Mac Pro (Late 2013; Mid 2010 and Mid 2012 models
For more information, see Apple requirements ( macOS Mojave - Technical Specifications)
-
Select the Citavi project to add.
-
Select the references that you would like to import and click Next.
-
Select the Knowledge Organizer categories and click Next.
-
Click Confirm.
-
Once the success message is displayed, click Close.
The selected Citavi data are imported into the current NVivo project. For more information on Citavi-NVivo data mapping, see section below.
NOTE The Citavi project changes are not synchronized with NVivo. In other words, if you make changes in Citavi, you will need to Share the Project with NVivo again.
Citavi-NVivo data mapping
When you import data from Citavi, you can choose to import specific references using the Add from Citavi Wizard.
|
In Citavi |
In NVivo |
|---|---|
|
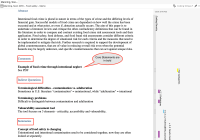
Categories |
Categories are located under the Coding section inside the Citavi folder. All the categories and sub-categories from Citavi are imported as codes and sub-codes retaining the original hierarchy and sorted as per the original order in Citavi. |
|
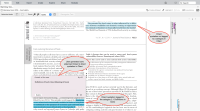
In NVivo, both references with PDFs and references without PDFs are in the folder Files/References:
|
|
|
References file classification details |
A new file classification type called Reference is created and linked to all the references imported from Citavi. The attributes for the Reference classification types are created based on each references’ metadata (Example - Author, title, year, etc). |
|
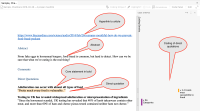
Direct quotations |
Direct quotations are brought into NVivo together with any user generated core statements. For more information, see References. |
|
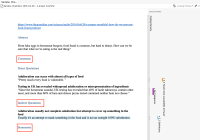
Comments, indirect quotations and summaries |
|


